I used to dread sewing anything by hand. Before I started machine sewing regularly, my hand sewing experience was limited to embarrassing attempts at reattaching buttons.
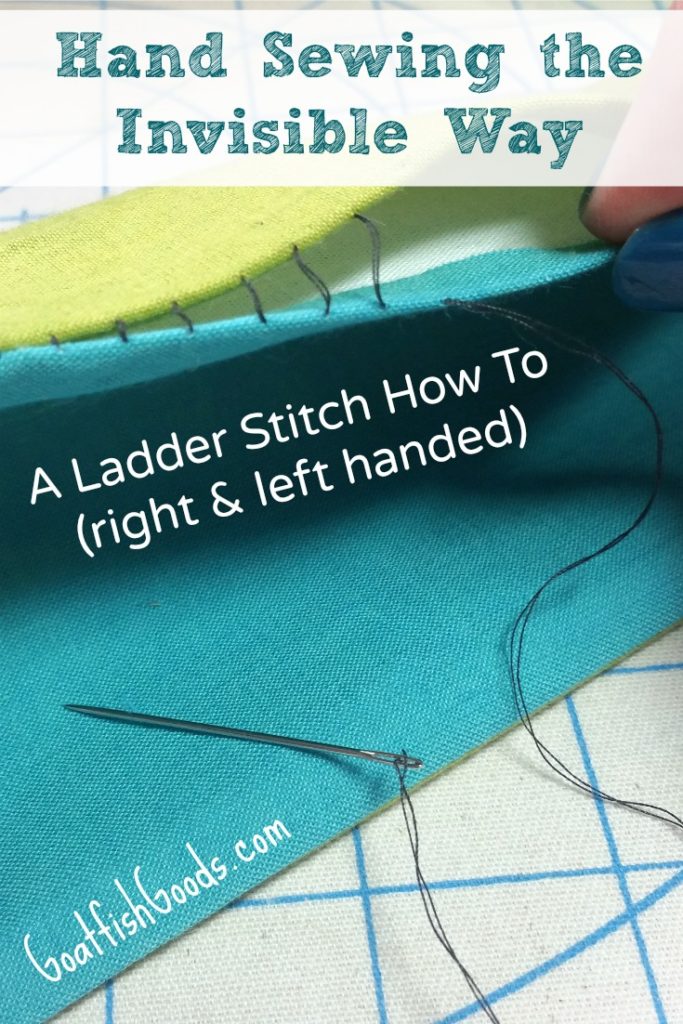
But, then! I discovered the oh-so-awesome ladder stitch, which is also called the hidden stitch, the slip stitch, and the blind stitch. It’s also referred to as the invisible stitch, which is entirely why it’s my favorite. I don’t have to fret whether my stitches look good or not because no one will ever see them.
You can use this stitch when hemming a garment, closing openings in pillow covers and softies (stuffed toys), when binding, doing applique, etc. But for the purpose of this tutorial, let’s just say you have a turning hole on a bag or pouch you need to sew shut with an invisible seam.
As a lefty, I had a hard time initially figuring it out because I could only find photos with a right handed bias (story of my life). That’s why I’d like to provide both the left AND right handed perspectives here in one place.
One more thing before we dig in… You may be here for this tutorial because you purchased my new PDF pattern, The Journal Sleeve. If this is the case, thank you… No, really, THANK YOU! I hope you had fun making one!
If you have no clue what a Journal Sleeve is, visit my big announcement for pattern information and loads of pics. Or, go straight to my Etsy shop to purchase the pattern and get started making one for yourself!
So, about that Ladder Stitch…
What you’ll need:
Pins: My favorites are Dritz Extra Fine Glasshead Pins
Wonder Clips (if your fabric is on the thick side)
A hand sewing needle: Any hand sewing needle will do, but I like embroidery needles because they have a large eye which makes them easier to thread. I usually just pick up a variety pack with sizes 3-9.
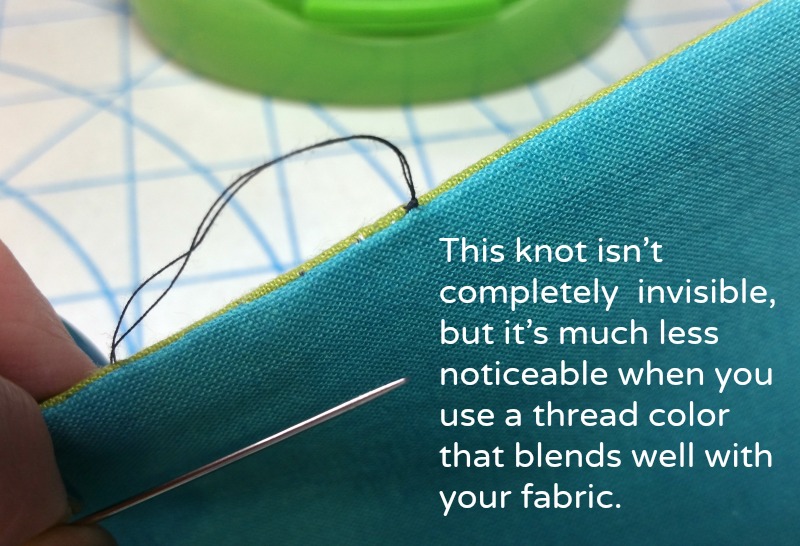
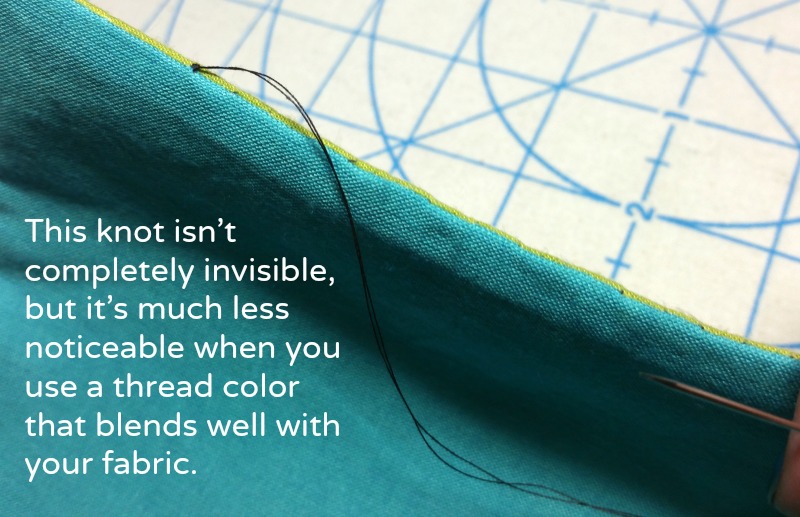
Thread: It doesn’t have to be anything special. Just grab the thread you used on your machine when constructing your project. Since your goal is invisibility, it’s best to go with a thread color that blends well with your fabric. I’m using a contrasting color this time for demonstration purposes.
A needle threader (optional): You’d think with the large eye of an embroidery needle, I’d be fine without a threader. Sadly, my old eyeballs sometimes need both the large eye AND my threader. Here’s the one that’s made my life a little easier.
Instructions:
The first few steps apply to both right and left handers. I’ll let you know when to go your separate ways.
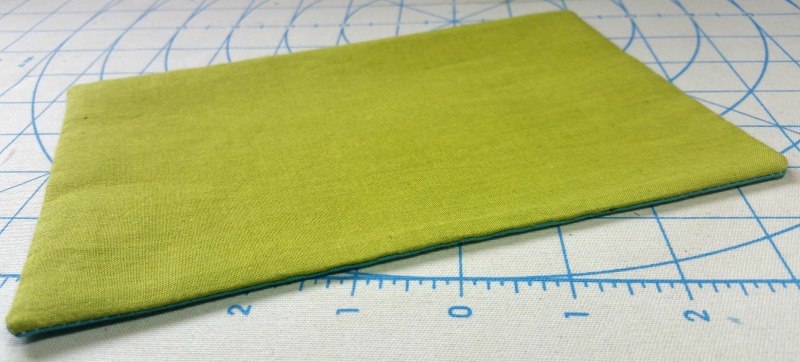
Let’s begin with the prepping of your project. My (pretend) project is green on the front and teal on the back and has a 3” opening which needs to be stitched shut. I’ve interfaced both fabrics with a mid-weight fusible interfacing (SF-101) simply because this is the thickness of fabric I often work with when closing bag openings.
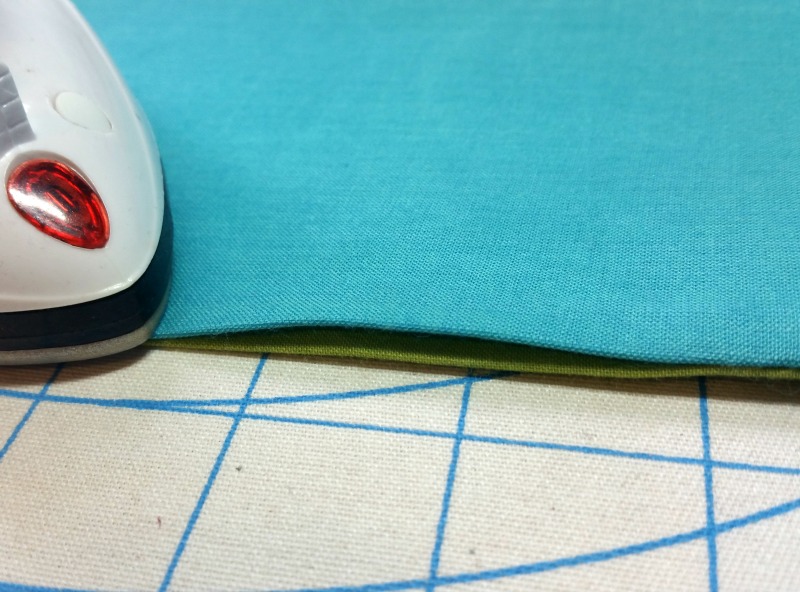
Regardless of the thickness of fabric, your opening will need to have two folded edges that have been pressed flat. This is important because the crisp crease of the folds will actually guide your stitches resulting in a tidy finish.
Now, unwind your thread until it is approximately the length between your fingertips and your shoulder when your arm is outstretched. Mine usually ends up to be around 26”. Thread your needle by hand or with a needle threader.
If you’ve never used a needle threader, here’s what you do:
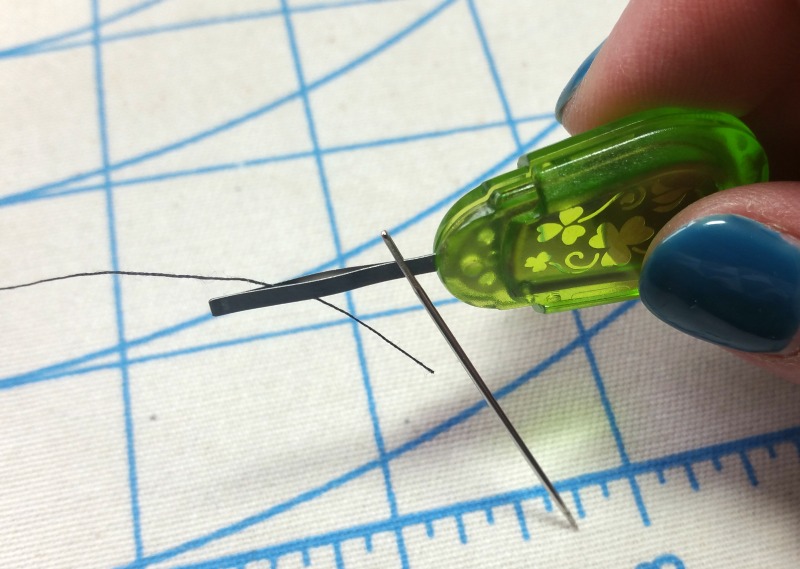
Insert the wire loop through the eye of the needle and stick your thread through the wire loop.
Now, simply pull the wire loop back out of the eye until the tail of the thread is through the eye and a few inches long.
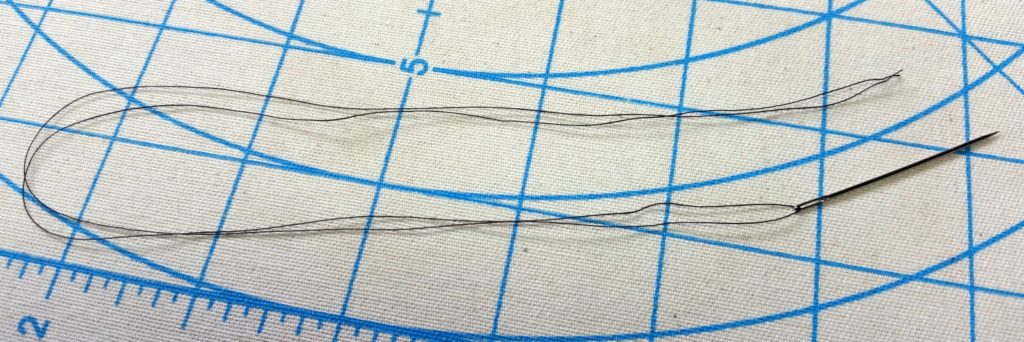
For added strength, we’ll be working with a double strand. Pull on one side until the ends are even.
Now we need to tie the ends together in a knot. If you are unfamiliar with the very handy and helpful Quilter’s Knot, take a look at this video tutorial by Easy Sewing for Beginners. It’s a clear demonstration and it provides both the left and right handed technique. Love that! The video begins with the right handed version and the left handed version can be found 45 seconds in.
With your project prepped and your needle threaded, let’s get to that invisible stitching!
We’ll start with you left handers. Right handers, click HERE.
Ladder Stitch How To – Left Handed
Ok, left handers! Hold your project so that its front is facing you and the opening is on top. Remember, the front of my project is green.
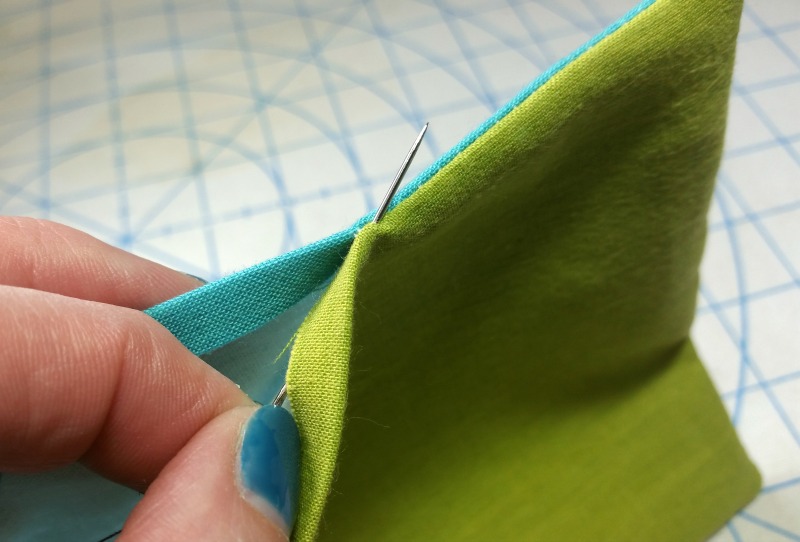
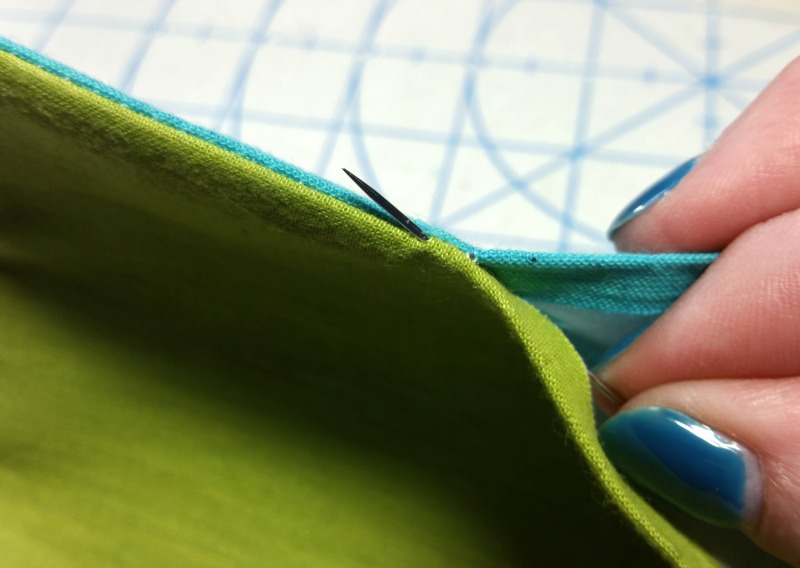
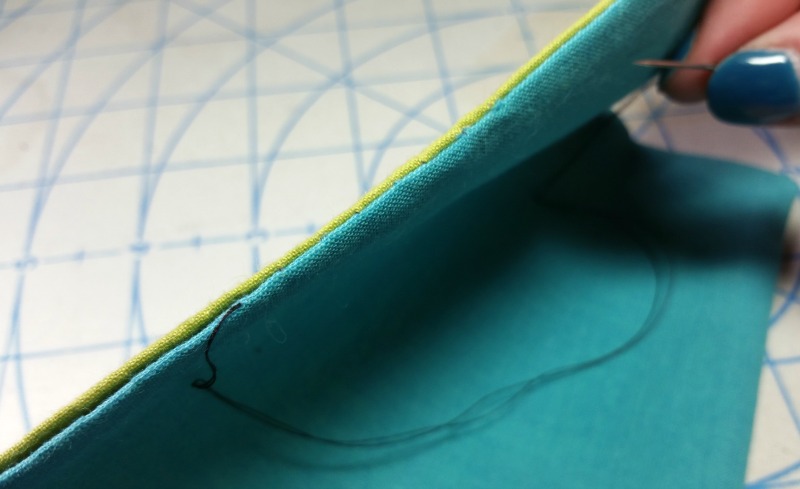
First, let’s hide the knot. Insert your needle into the right side of the opening and push it out through the top of the folded edge closest to you (the front fabric) just outside the point where the opening begins.
Pull the thread until the knot catches. The knot should now be completely hidden inside the opening.
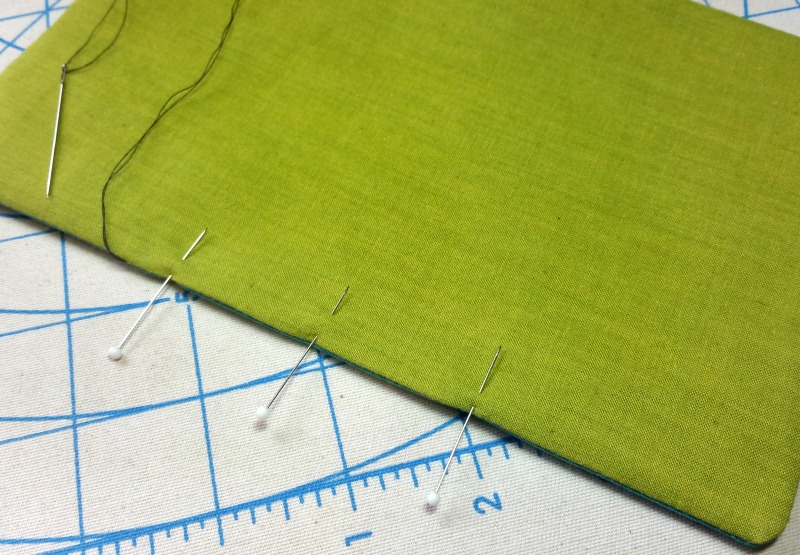
Next, pin the opening shut to keep the folded edges nicely lined up. If your fabric is too thick for pins to handle, use Wonder Clips instead.
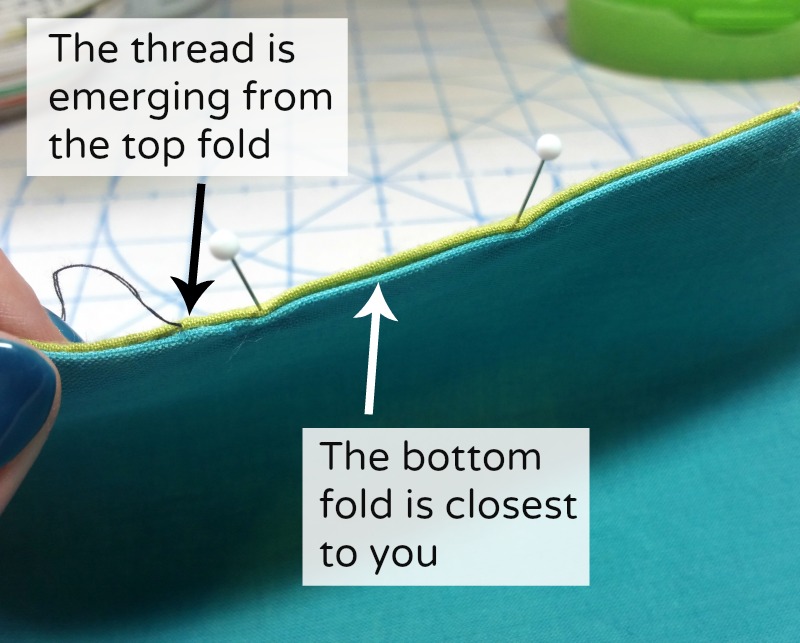
Turn your project around so its back is facing you. Once more, the back of my project is teal. The knot you just hid away should now be on your left.
Notice you have a top fold (where your thread is) and a bottom fold that is closest to you. You’ll be stitching from left to right.
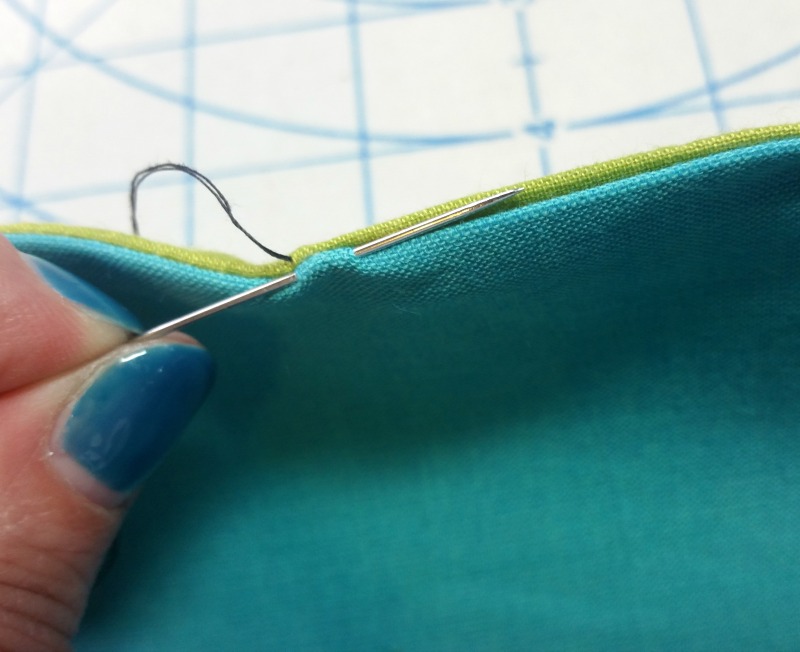
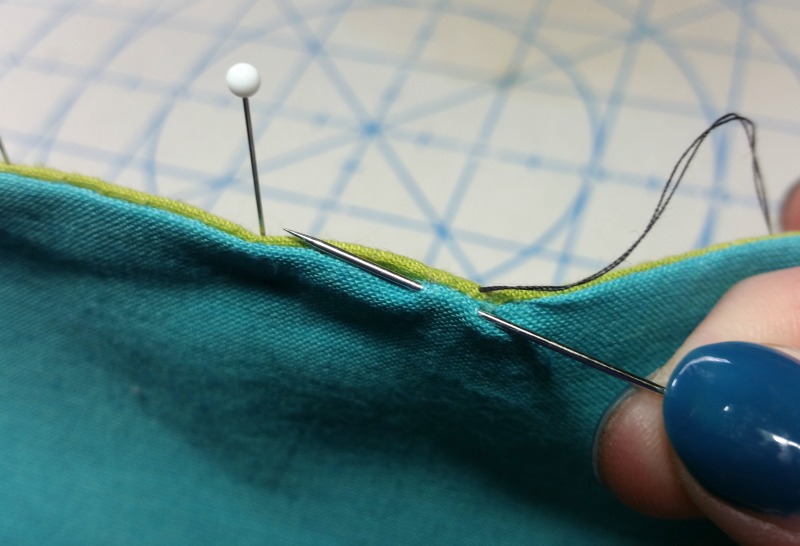
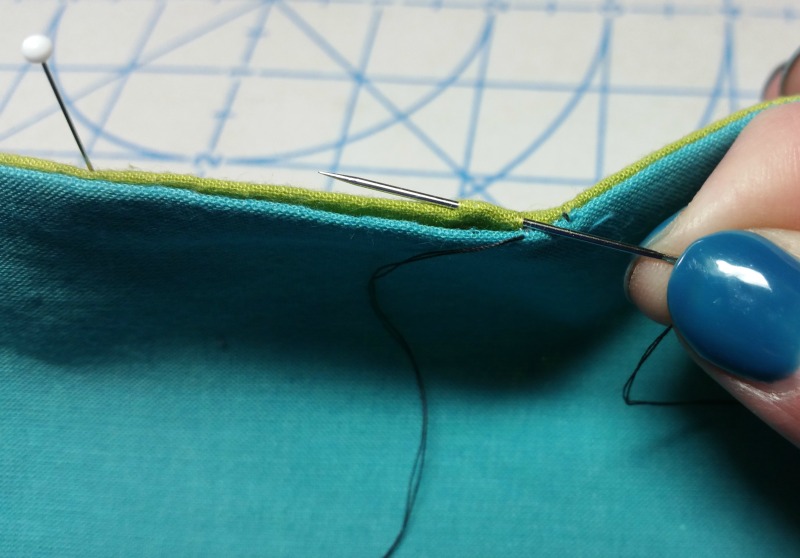
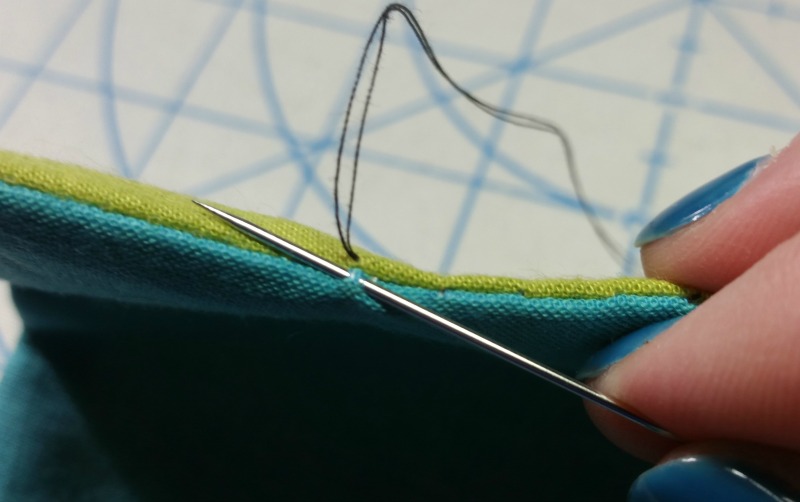
Next, insert your needle into the bottom fold directly across from where the thread came out before. Let the needle follow the crease of the fold and take a stitch that is about 1/4″ long. Push the needle out through the crease of the fold and pull the thread through gently. Try to keep a somewhat consistent stitch length as you make your way across the opening, but perfection is not required!
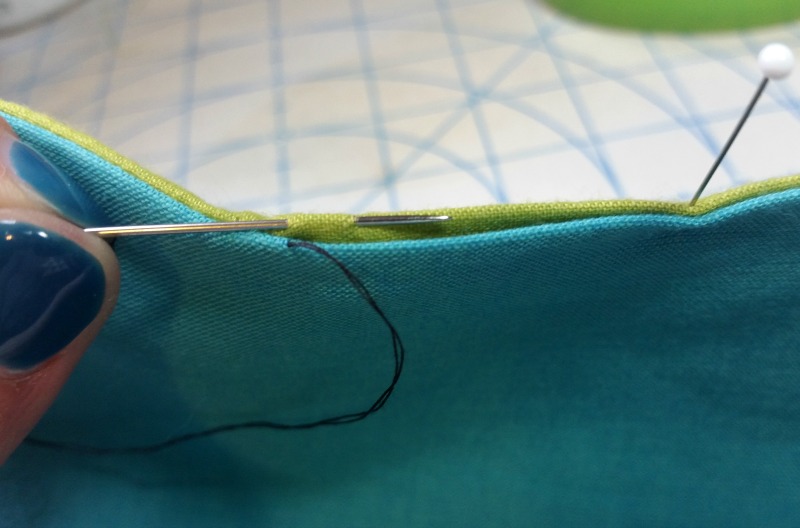
Now insert the needle into the top fold directly across from where the thread came out on the previous stitch. As before, follow the crease of the fold and take another stitch about the same length as your first one.
Continue your stitches back and forth across the opening. Pull your thread taut (not tight) every 2 or 3 stitches.
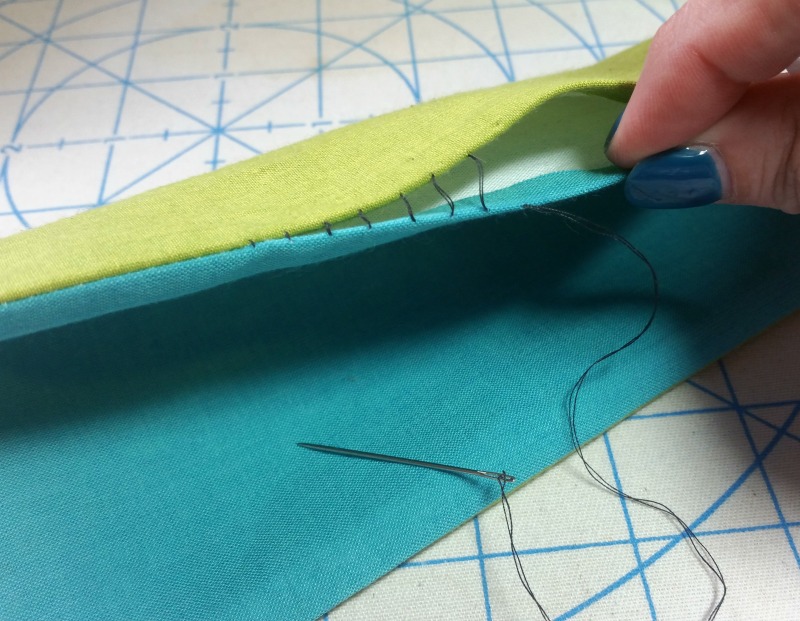
When the stitches are loose, you’ll see how they resemble rungs on a ladder.
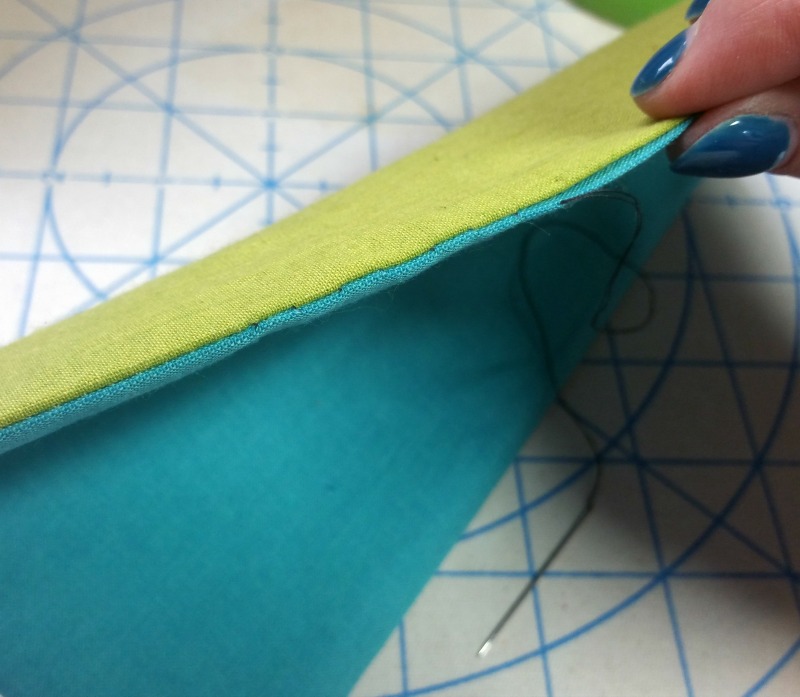
Then, as you pull the thread, the seam will close with your cool, invisible stitches. Be warned, though… if you pull too hard, the thread will break, you’ll swear a little, and then you’ll have to start over!
To get the best result, make sure you are starting each stitch straight across from where the thread came out from the previous stitch. NO diagonal jumping from fold to fold! Also, to keep things invisible, keep your stitches along the very top of the folded edges so the fabric doesn’t dimple when you tighten your stitches.
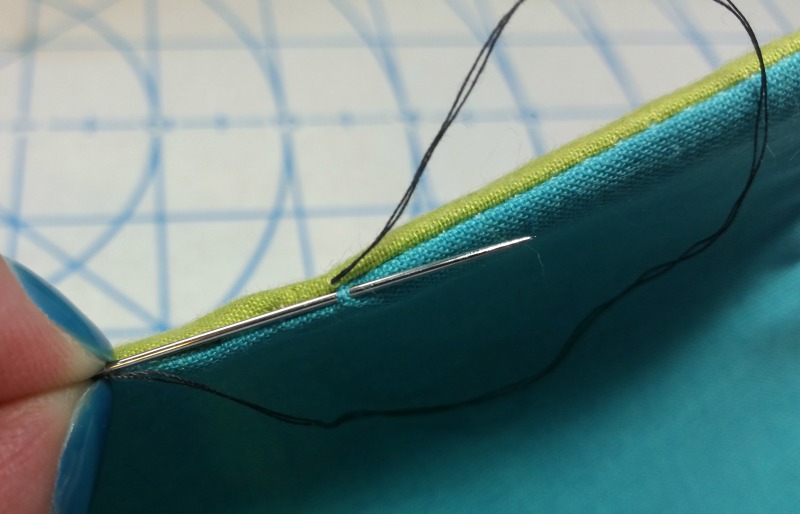
Your last stitch should emerge at least 1/8” past the end of the opening.
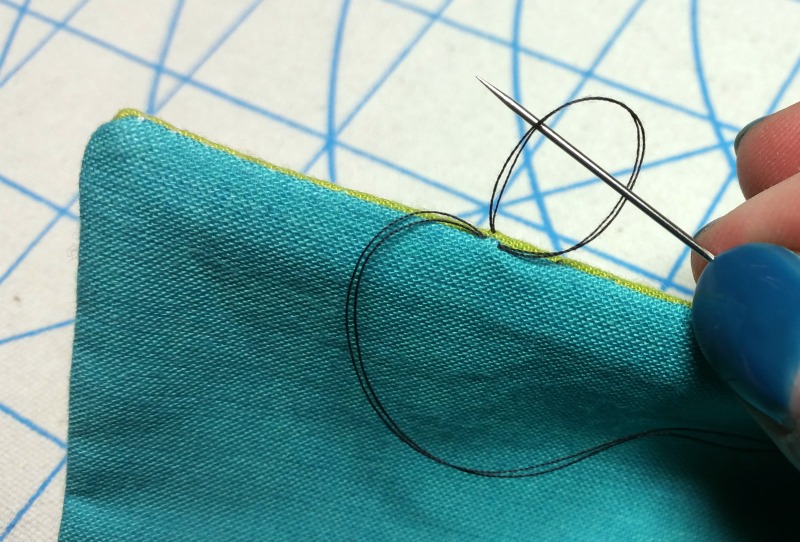
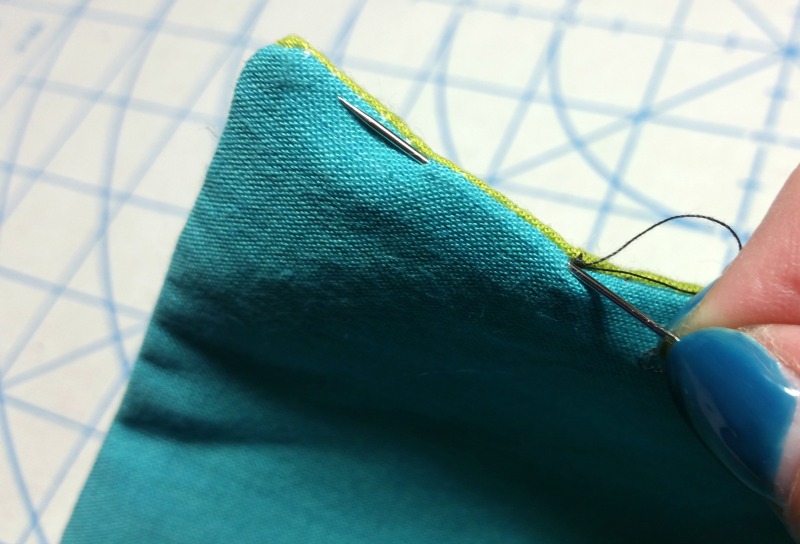
After you make sure your stitches have been tightened up and you are satisfied with your masterfully handsewn seam, pick up a tiny bit of the fabric directly across from where the final stitch emerged.
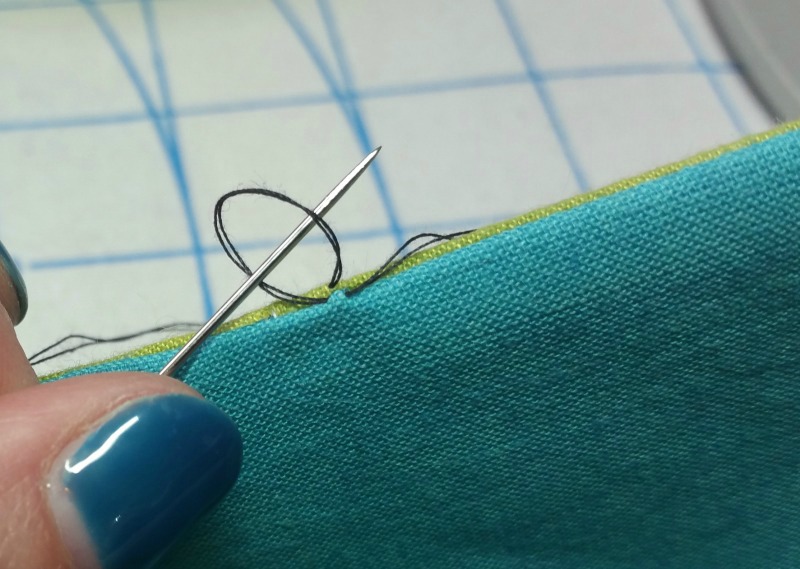
Pull your needle through leaving a small loop of thread and stick your needle through it twice before slowly pulling it tight (to avoid tangling).
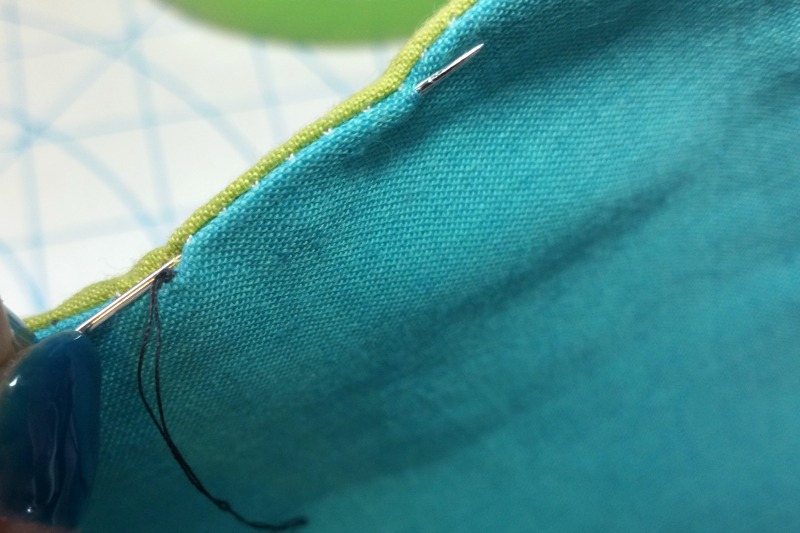
To hide the thread tails, stick your needle down right next to the knot and come back out a little further down the crease of the fold.
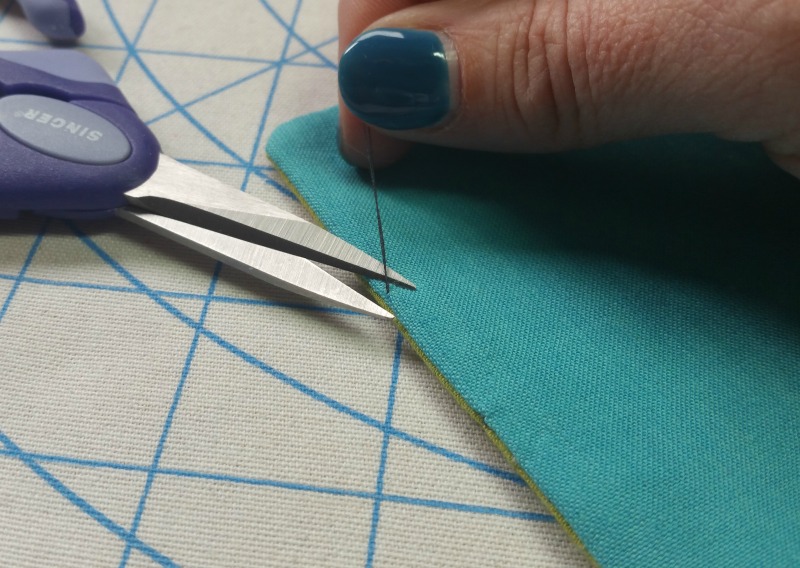
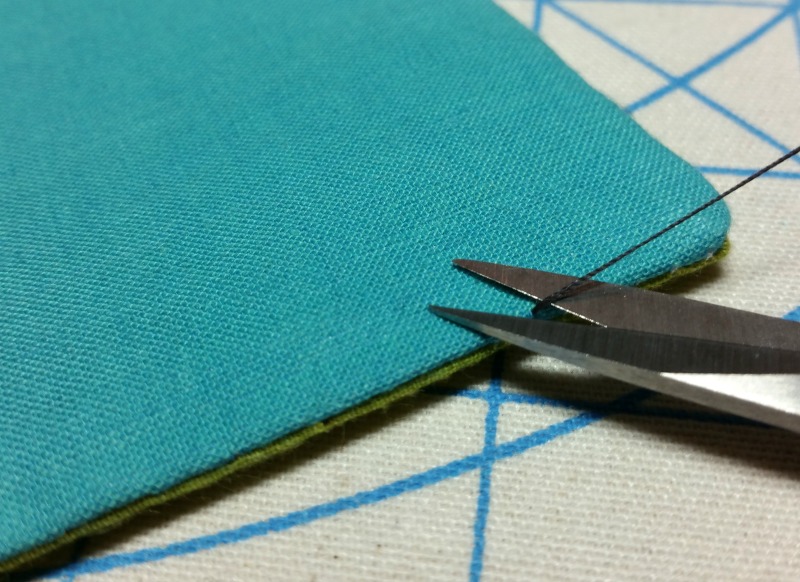
Pull on the thread slightly and carefully snip it very close to the fabric. Once it’s cut, it will draw back into the fabric and disappear.
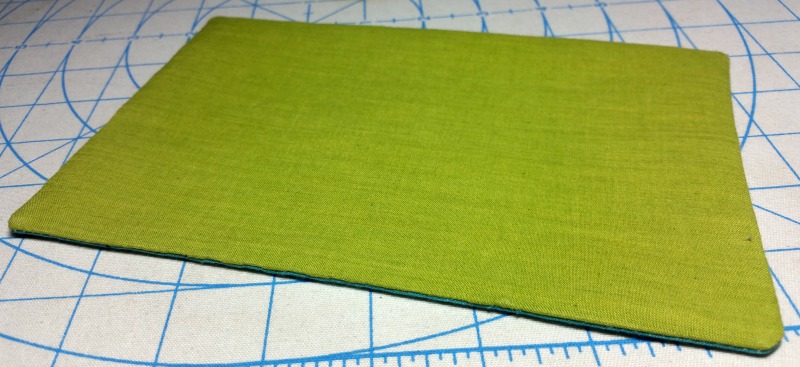
I like to give the seam a final press at the very end so it’s nice and flat.
And you’re DONE! I hope you enjoyed ladder stitching and that you love your new powers of invisibility.
Ladder Stitch How To – Right Handed
Ok, right handers! Hold your project so that its front is facing you and the opening is on top. Remember, the front of my project is green.
First, let’s hide the knot. Insert your needle into the left side of the opening and push it out through the top of the folded edge closest to you (the front fabric) just outside the point where the opening begins.
Pull the thread until the knot catches. The knot should now be completely hidden inside the opening.

Next, pin the opening shut to keep the folded edges nicely lined up. If your fabric is too thick for pins to handle, use Wonder Clips instead.

Turn your project around so its back is facing you. Once more, the back of my project is teal. The knot you just hid away should now be on your right.
Notice you have a top fold (where your thread is) and a bottom fold that is closest to you. You’ll be stitching from right to left.
Next, insert your needle into the bottom fold directly across from where the thread came out before. Let the needle follow the crease of the fold and take a stitch that is about 1/4″ long. Push the needle out through the crease of the fold and pull the thread through gently. Try to keep a somewhat consistent stitch length as you make your way across the opening, but perfection is not required!
Now insert the needle into the top fold directly across from where the thread came out on the previous stitch. As before, follow the crease of the fold and take another stitch about the same length as your first one.

Continue your stitches back and forth across the opening. Pull your thread taut (not tight) every 2 or 3 stitches. When the stitches are loose, you’ll see how they resemble rungs on a ladder.
Then, as you pull the thread, the seam will close with your cool, invisible stitches. Be warned, though… if you pull too hard, the thread will break, you’ll swear a little, and then you’ll have to start over!
To get the best result, make sure you are starting each stitch straight across from where the thread came out from the previous stitch. NO diagonal jumping from fold to fold! Also, to keep things invisible, keep your stitches along the very top of the folded edges so the fabric doesn’t dimple when you tighten your stitches.
Your last stitch should emerge at least 1/8” past the end of the opening.
After you make sure your stitches have been tightened up and you are satisfied with your masterfully handsewn seam, pick up a tiny bit of the fabric directly across from where the final stitch emerged.
Pull your needle through leaving a small loop of thread and stick your needle through it twice before slowly pulling it tight (to avoid tangling).
To hide the thread tails, stick your needle down right next to the knot and come back out a little further down the crease of the fold.
Pull on the thread slightly and carefully snip it very close to the fabric. Once it’s cut, it will draw back into the fabric and disappear.
I like to give the seam a final press at the very end so it’s nice and flat.
And you’re DONE! I hope you enjoyed ladder stitching and that you love your new powers of invisibility.
Thank you so much my stitches look amazing lm left handed so have a few problems when sewing.l will now ladder stitch everything lol. I have just found your website. Once again thank you
What a great tutorial! and for left handers as well…love that!
Thanks very much! That means a lot coming from you!